
ATMdesk for Field Service
ATMdesk for Field Service runs directly on the ATM’s PC core to test the installed modules in an ATM.
If you are a third-party ATM service provider or a financial institution that wants to maintain your own ATMs, use ATMdesk for Field Service to keep your ATM network up and running.
What it’s for
By using ATMdesk for Field Service, you can test NCR 53xx EasyPoint, 56xx and 58xx Personas, and 66xx SelfServ ATMs and their modules.
Since its first release in 2007, ATMdesk for Field Service has helped to maintain more than a hundred-thousand live NCR ATMs.
How it works
ATMdesk for Field Service is a Linux-based live CD or USB. To launch it on an ATM, you reboot the ATM from external media (CD or USB). It is not installed on the ATM’s hard disk drive (HDD), leaves no traces within the ATM, and is independent from the software that is installed on the ATM’s HDD.
The following typical scenario demonstrates how quickly you can start using ATMdesk for Field Service.
1. Reboot the ATM.
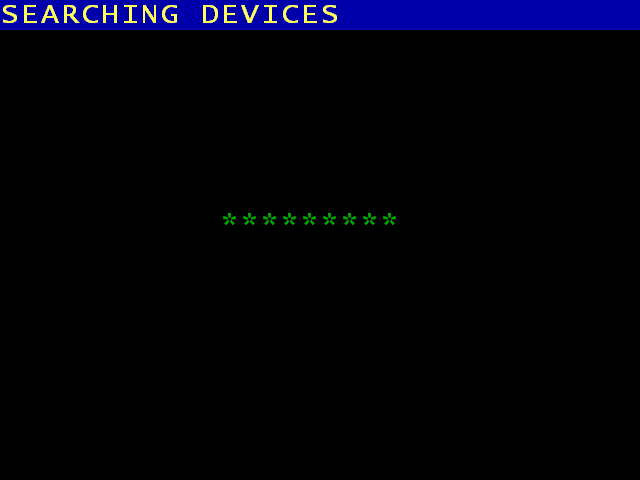
To begin, you shut down Aptra and Microsoft Windows, insert the ATMdesk CD or USB, and start the machine. The software runs and searches for all connected devices.
2. Insert the USB Key.
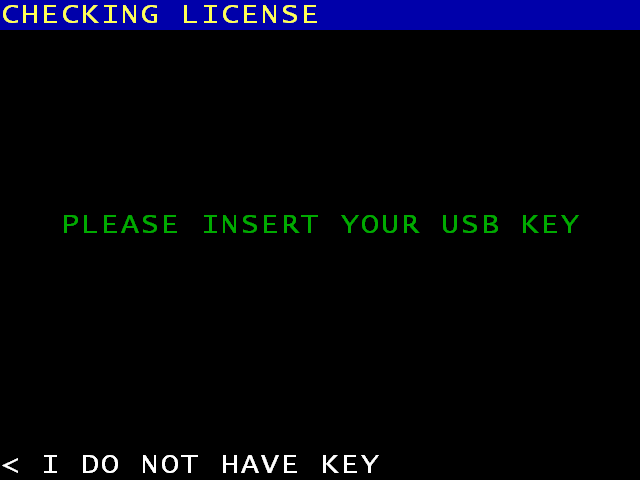
When prompted, you insert your ATMdesk USB key. The software validates your license and can warn you whether the license or key will expire soon.
3. Enter the Main menu.
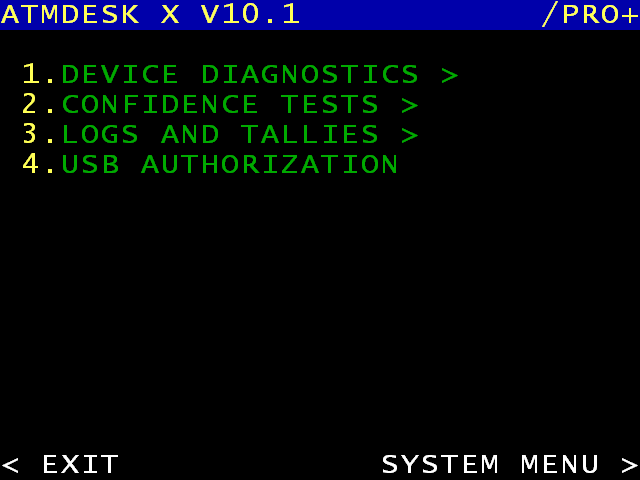
From the Main menu, you see the various diagnostic options. Ensure that your USB key remains inserted at all times while using ATMdesk.
4. Check the device list.
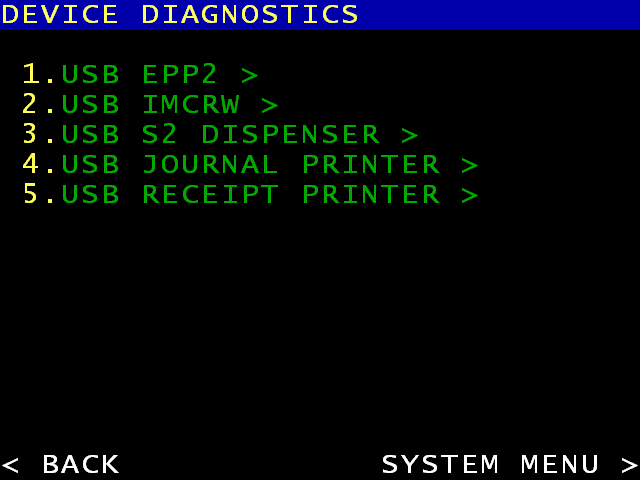
When you select DEVICE DIAGNOSTICS, ATMdesk shows all devices that it found on your machine that you can test.
5. Review available tests.
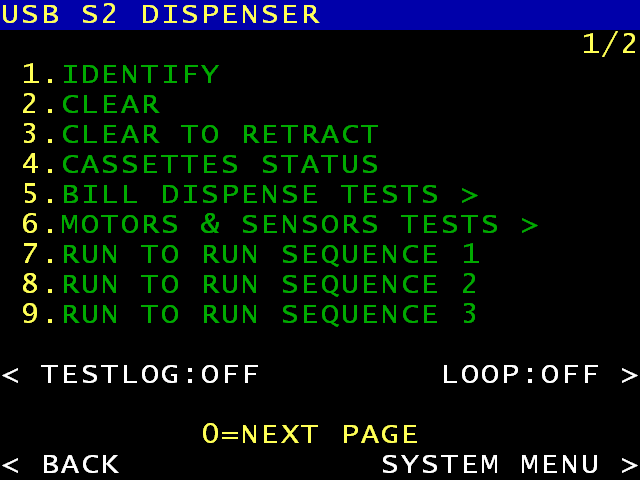
When you select, for example, DISPENSER, ATMdesk offers a variety of dispenser tests.
6. Try to dispense bills.
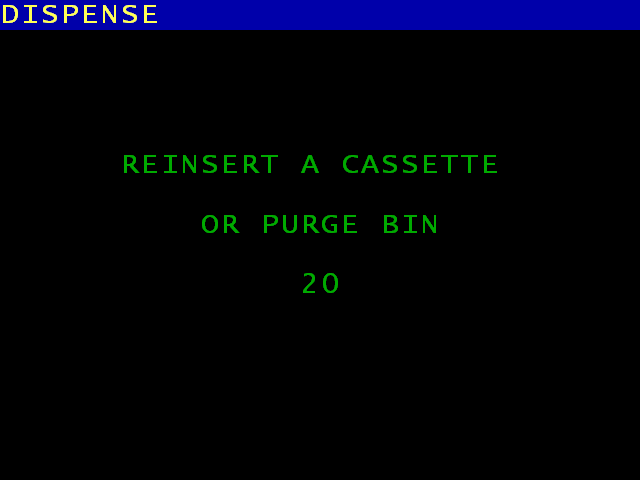
Cash-sensitive tests are allowed only after you gain physical access to the device. Unauthorized payout is not possible.
7. Get the test results.

Upon test completion, ATMdesk displays M-Status, M-Data, and all available details in clear text.
8. Authorize USB devices.
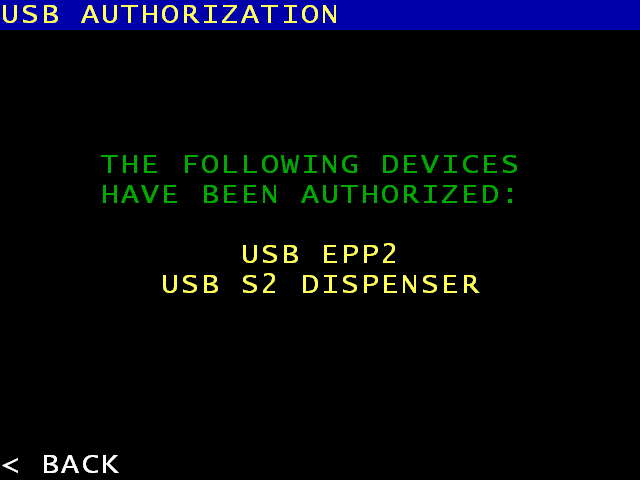
If you replaced a USB device, you can select USB AUTHORIZATION, and then NCR Aptra accepts the new device.
9. Check the error logs.
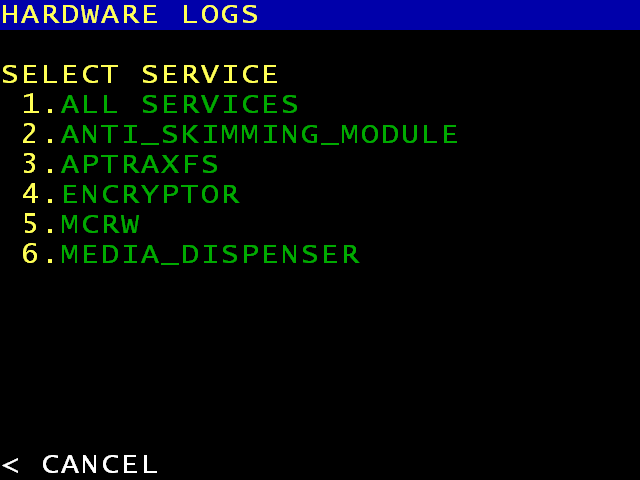
You can check the ATM error logs for any suspicious events that suggest a potential failure in the near future.
10. Run confidence tests.
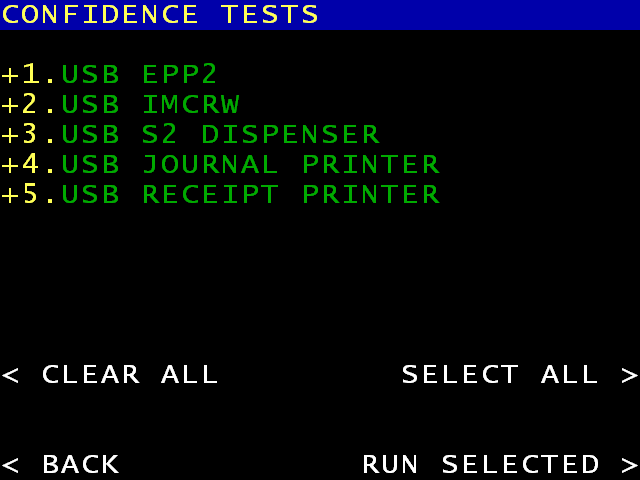
When you select CONFIDENCE TESTS, you can quickly verify the overall ATM functions before you put the ATM back in service.
11. Print or save reports.
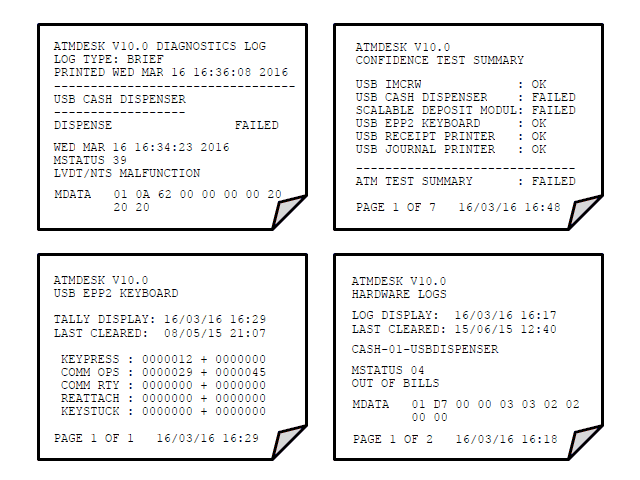
You can print or save the ATMdesk diagnostic output, ATM logs, and tallies for documentation purposes.
12. Exit and reboot.
You are now done. When you select EXIT, you can remove your ATMdesk USB key. The ATM restarts and goes back in service.